Ultimate (Useful) Commodore 64 Upgrades and Mods List
[ UPDATED: 11/24/2025 ]
This is my attempt to document and catalog all the (proven) mods and upgrades makers have developed for our beloved system over the years. Some will still be available, others might be relegated to eBay or whoever might revive them via reverse-engineering or building from sources. I’m not trying to be completely comprehensive here, as there are a great many “died on the branch” projects that were never completed, are focused solely on niche use cases, or simply never got enough support or traction to develop into a fully user-ready component. Case-in-point: There are SID projects out there intended for use in home-built SID jukeboxes, not necessarily in an actual C64. Those aren’t presented here because my intent is to provide options that will still let you use your Commie in its full, original form.
Rather than flirt with information overload, I’m only looking to build a curated list of options for folks who are trying to repair their system or are looking for new directions to help it grow.
The order of presentation is not specifically ordered, except for instances where I think a particular entry offers a better value in some way might be presented first.
- Stock Fix
- PSU
- Case
- ROMs
- Chips
- Video
- Audio
- Connectivity
- Storage
Fix Restore Key
Project: Make RESTORE key behave like all the other keys
Target : C64 (not necessary for new boards)
Time   : 15 min.
Cost   : <1 US$
Use    :  Save the RESTORE key from failure, for great justice!
Summary
Replace ‘NMI-capacitor’ C38 with a 4.7nF one.
Details
The value of the original capacitor responsible for triggering the NMI via the timer 556 is too little (51pF) in old C64 boards). On account of the pressure-dependent resistance of the keys, pressing the RESTORE key just as softly as the other keys is not sufficient for producing a trigger signal at the timer’s TRIG input. Therefore, we will replace it with a 4.7nF capacitor.
The problem described above was fixed in the new PCBs and in the SX-64.
Ingredients
1 x capacitor 4.7nF
Instructions
Pull off all cables and open case.
Search for capacitor C38 (51pF) near bottom-left corner of the mainboard (see image below). In most boards it is built into a resistor case with green base color! Its color code is: green-brown-black
Unsolder it and replace it with the 4.7nF one.
Connect power plug.
Switch your C-64 on. After the startup screen appeared, press [RUN/STOP]-[RESTORE] just as softly as you would usually hit the other keys. Repeat that procedure a few times and if the RESTORE key seems to behave like the other keys, close the case again.
Possible failures
Replaced the wrong capacitor. Often the capacitor is built into a resistor case.

Looks like a resistor, but it’s a light blue or greenish color in slot C38, very bottom-left corner of the mainboard (board v250407 shown here)
Keelog PSU

https://www.keelog.com/power-supply/#c64
If you still have the original design power supply that came with the C64 back in the day, you know, the one that weighs a ton and is pretty much a solid block of epoxy? Chuck it. Out the window, off a cliff, into that creepy uncle’s 70th birthday cake, I don’t care; get rid of it right-flippin’-now! They are known to wear down and burn out chips and mainboards with abandon and absolute disdain. They are a plague on modern electronics design. Modern, reliable replacements can be had for quite cheap, and bonus: they don’t weigh as much as a waterlogged armadillo!
I have one of these, and they operate quite clean and reliably. I do wish the wall side of the power cabling could detach for storage, but the unit is small enough that it really doesn’t matter in the long run.
C64PSU

Another option, a bit more utilitarian but has its own cutoff switch. Can be a bit more expensive than the Keelogs.
Retro Fuzion

A great way to get alternate case colors without resorting to spray paint. UGH!
Compatible with most C64 board types.
Individual Computers

Individual Computers is the current holder of the ORIGINAL C64c case molds, and they’re producing cases in a variety of color schemes, from the original 64c eggshell, to the 64 breadbin beige, and including SX64 black/blue and transparent!
They cost a little more and there’s some waiting involved, but these are factory-new cases with custom options that you never could have had without taking a risk with an old-fashioned rattle can on your own (or of course paying for a refurb job from Ami64!
* https://icomp.de/shop-icomp/en/produkt-details/product/c64c-case.html
Note: You do not need any of these if you have a 1541 Ultimate II; it does kernal swapping natively already! There are other 3rd-party devices out there that will also do kernal-swapping via cartridge port.
One ROM (formerly Software-Defined Retro ROM)

No removable E/EPROM chip required.
Available storage for up to 8 ROMs.
Programmable in-place!
Can operate in any or all of the three C64 ROM slots.
Switching functionality is currently done with jumpers, but developer is working on something even better.
https://github.com/piersfinlayson/software-defined-retro-rom
8-in-1 Kernal ROM Replacement

A great way to replace the case on a budget, these are used cases for both breadbin and 64c, cleaned, refurbished and custom-painted as you like.
So this one comes pre-programmed with alternate kernals, and you switch the “active” one with the little teeny rotary dial before booting up. This does require opening up the system and potentially de-soldering the existing kernal ROM chip so you can socket this one in. It also has a rotary switch with more positions than there are storage slots on the chip, so I’m not sure what’s up with that. Good cheap option if you don’t change kernals often, cannot be modified unless you have the programmer and adapter to change the contents (so no JiffyDOS unless you add it yourself). Anyway, the ROMS that come pre-loaded are:
0 – Original Kernal [901227-03]
1 – 64er v1 (kernal-only fastload capabilities)
2 – DeadTest (781220)
3 – DolphinDos 2.0 (designed to work with a parallel add-on card for the 1541)
4 – MemoStar
5 – SD2IEC22 2.2 (for SD2IEC storage solutions)
6 – SX-64 2.0 Original Kernal
7 – TurboDos 3.0 (another kernal-only fastloader, from Compute! magazine)
Open 64 Kernal Cart

Cheap, DIY and more accessible version of the 8-in-1 above. Works as a cartridge and uses jumpers to set the intended kernal to load.
8-in-1 Kernal Cartridge

Once again, pretty much the same as above, but this one is actually built and loaded already, and uses switches instead of jumpers. Same limits apply in that you can load your own kernal images onto it, if you have the necessary EEPROM programmer.
* https://www.ami64.com/product-page/8-in-1-kernal-cartridge-for-commodore-64
PLA
The PLA is a common point of failure in our aging C64s (it has been suggested they were designed to fail over time), and when that puppy goes, things stop working in ways that make the system difficult -if not impossible- to keep using. Thankfully, there are a few reverse-engineered and recreated replacement options available to bring that component up to a new replaced state.
[DIY] : PLA20V8
[BUY] : PLA20V8

I can personally vouch for this one; it’s running flawlessly in my C64 breadbin, which has one of the oldest common model mainboards still running.
* https://www.8bitclassics.com/product/commodore-64-pla-replacement-pla20v8
PLAster™ V2 (PLA replacement for C64 U17)

From BackBit, appears to no longer be made/sold on their site (link below for posterity, but doesn’t lead to a product page anymore)
* https://store.backbit.io/product/plaster (appears to be no longer m
J-PLA C64 – PLA Replacement

PLAnkton by Eslapion

SlimPLA the compact Commodore 64 PLA Replacement PLA20V8 82S100

RAM
RAM isn’t a very common failure, but when it goes, it can be frustrating to track down and isolate, let alone find a replacement component for a bad chip. Happily there are options here as well.
SRAM replacement (mod)

* https://cbmretro.fi/product/sram-memory-replacement-for-c64-assy-250407-and-250425/
This mod replaces all of the OEM RAM chips with a newer SRAM solution (for specific mainboard revisions), and resolves a hardware scrolling bug known as the VSP bug.
OEM restoration option

CPU
Ah, the beating heart of the beast. Like any modern machine, the CPU goes out, nothing will be getting done today! Replacement is non-negotiable if it dies!
MOS CPU Replacer (DIY or assembled)

[ MOD ] : MCL64 "SuperCPU" Accelerator

* https://github.com/MicroCoreLabs/Projects/tree/master/MCL64
This is an accelerator CPU mod that boosts the stock C64 speed almost 2x!
Read more details about the project here.
CIA

Video (VIC-II)
VIC-II Kawari

(See VIC-II Kawari in Video tab. That is the only currently-viable full chip replacement, but provides a lot of extra features as well)
The VIC-II chip provides the video signal, and audio gets mixed in before output to the RF and component jacks. Because the only existing replacement for a dead VIC-II is currently the VIC-II Kawari, but that replacement also serves as a major upgrade mod as well, details for this little hard-working beast are over in the Video tab.
[ HDMI ] : HD-64
* https://www.retro8bitshop.com/product/spl-hd-64/
* https://www.retro-updates.com/product/17245372/hd-64-commodore-64-hdmi-output-fpga
Awww, VIC-II-Dizer got all growed up! This project takes lessons learned from the Lumacode concept, and refines it all into a single board that provides HDMI video and audio output from a single port! The asking price of about $120 is not bad at all, considering what it would cost to build up the same capabilities with a VIC-II-Dizer, RGB2HDMI hat, Raspberry Pi Zero, and HDMI audio injector. Even using the cheapest possible options, you’re still going to spend more than you would just getting one of these instead.
There are other benefits with this new iteration as well. Internal audio injection so sound just works over the HDMI output like any other modern console. Full internal compartmentalization of the whole thing, so you don’t have additional power and video connections mucking up the joint. Easier time updating and changing settings, because again, it’s all internal and wrapped up neatly, so no messing around with little buttons and trying to figure out what does what for the umpteenth time because you don’t change these settings often enough to remember the layout of the programmable button positions.
[ REPLACEMENT/MOD ] :VIC-II Kawari
* https://accentual.com/vicii-kawari/
* https://videogameperfection.com/products/vic-ii-kawari/
A little expensive by comparison, but have you seen the going prices for intact VIC-II chips on the market today? And that’s still taking a risk on whether the chips are even functional in the first place! They aren’t made anymore, so any OEM replacement you find is guaranteed original, but also used and possible to fail as well (and of course, eBay being what it is today, you’re taking a risk on whether the chip is even authentic, let alone working as expected).
[ HDMI ]: VIC-II-Dizer / RGBtoHDMI

This is a three-parter.
VIC-II-Dizer
The VIC-II-Dizer is an interceptor sled that sits between the VIC-II chip and its socket. It cleans up the RF output almost completely by intercepting the video before the audio and color mixing stage, leaving a simple and clean greyscale image coming from the RF output jack. That signal then feeds into the second part:
* https://www.tindie.com/products/c0pperdragon/vic-ii-dizer/

RGB2HDMI
This is a Raspberry Pi Zero hat (so you’ll need to add a RPi Zero), which receives the clean greyscale image, reads it frame-by-frame and applies the colors. With 16 origin colors in the palette, it’s relatively easy work to determine what color was intended by a given pixel’s grey level. After colors are applied, the stream is output on the Pi Zero’s HDMI port, giving a pixel-perfect picture on any modern display! You can add additional scanline effects or use alternate color palettes to refine the image to taste.
All of this results in a video stream that is really pure, and lag times are far FAR lower than the more commonplace external video upscaler (Retrotink, etc.) methods used to clean up the stock video output.
The downside is that our video feed looks great now, but we don’t have audio on that feed any longer. I mean, mixing the audio on the RF output was part of the noise issue in the first place, but it didn’t really matter way back in the days of lo-fi tube TVs in the living room. There are projects working on re-merging that audio on the HDMI connection again, but they’re still a bit ad-hoc at the moment. Personally, I just grabbed a component cable and connected a pair of powered desktop speakers to the sound output lines from the component DIN jack instead. It sounds a lot better than the TV speaker anyway.
[ RF ]: Lumafix

Cleans up the stock video output signal, (won’t help the older 6567R5 model VIC-II very much).
* https://www.protovision.games/shop/product_info.php?products_id=197
* https://retrorewind.ca/lumafix64
This mod also sits between the VIC-II chip and the mainboard, but it allows you to fine-tune the chroma signal components on the way out, helping to reduce the presence of jailbars and other artifacts originating from the chroma signal. LumaFix64 is intended to give users a means to fine-tune the rather ham-handed muxing process Commodore utilized for video output. If your image is mostly good but has weird vertical bars ghosting over it, this will introduce an inverted version of the chroma signal, which you can then tune to effectively cancel out the noise.
It will not help much if the noise source is on the audio side, characterized by faint diagonal lines usually moving across the image, or “warbling” edges of letter and high-contrast graphics.
[ COMPONENT ]: C0pperdragon's Component Video Mod

This mod uses an FPGA to bypass the luma/chroma muxing function of the old RF can assembly inside the C64, re-interpret the intended output and generate a proper component (YPbPr) signal. It’s a proper RGB output for the Commodore, and also has a S-video bypass for the most accurate video timing (for those speedrunning folks among us).
* https://videogameperfection.com/products/commodore-component-video/
ARMSID

[ Best option as direct stock replacement]: A direct drop-in (literal plug-n-play) SID replacement, works for MOS 6581 and 8580. Supports the unique functionality some programs rely on, like 1351 mouse, paddle controllers and random number generation (because the original SID could generate white noise, a great source for random numbers!)
FPGASID

A major upgrade to the original! This will work as a SID replacement and so much more! Not only does it feature improved standard audio, it can also convert the audio stream to (simulated) stereo, emulate a second SID for six voices (or true stereo!), support all the unique special functionality mentioned above, and can even run a keyboard light show! Not a bad way to invest 80 Euros (86 USD) at all!
* https://webstore.kryoflux.com/catalog/product_info.php?products_id=63
SwinSID

Comparable to FPGASID. Must be the Ultimate variant, if you’re interested. Prior versions had some compatibility and teething issues. This one had a difficult time growing up, but it had some very patient and devoted devs to raise it up, and now it’s an upstanding contributing member of C64 enthusiast society. Sounds (heh) like a steal at 39 Euros!
BackSID

Another drop-in replacement, but with some tweakability. This one is even cheaper at 32 USD, reproduces nearly all of the original’s features (minus the rarely-used audio passthrough capability) and offers settings tweaks to refine the sound to your liking.
TeensyROM

This one is really cool. It’s not primarily intended for connectivity, but the host controller supports ethernet connectivity, so it’s made available for use in this project too!
Once connected to an ethernet line and configured, it’s a stupid-fast (virtual) modem that can connect with any of many BBSes still being maintained via telnet today!
I have a more detailed write-up on this bit of wizardry here.
C64/C128 WiFi Modem

https://retrorewind.ca/c64-wifi-modem
Uses the ubiquitous and open source Zimodem firmware, a dead simple userport expansion that lets your Commie connect to your wifi network, and “dial” out to BBSes that live on through telnet!
StrikeLink

A variant of the WiFi modem, but a little simpler in that it wasn’t designed with an enclosure. You can buy one prefab in all its naked glory, or get one with a 3D printed case. Proven-working firmware has been updated by Alwyz and is available right here on this site. If you’re concerned about deviations from “stock” you can still get the original distribution of the firmware from http://www.mediafire.com/file/tm71a1oa1a3macc/alwyz_modded_firmware.rar
OR, you could build one of your own with a 3D printed case from my walkthrough, or buy one completed and ready to go (wink, wink)!
* [ MODEM ]: https://www.tindie.com/products/topsider/strikelink-wifi-modem-c64-designed-by-alwyz/
* [ CASE ]: https://corei64.com/shop/index.php?route=product/product&product_id=108
* [ MODEM w/ CASE ]: https://retrolemon.co.uk/commodore-upgrades/152-commodore-strikelink-wifi-modem.html
I made one of these, and wrote about it here.
WiC64


This neat little doodad does what the StrikeLink does, but ohhhh so much more. While the StrikeLink mimics a (superspeed) serial modem, using an ESP32’s wifi module to make the connection, it can only do modem-like things, such as “dialing” out to BBS addresses.
The WiC64 communicates with the mainboard via the userport over a parallel connection, meaning the data it pulls down is darned-near instantaneous for that little C64! A great deal of its usefulness relies on connecting to the WiC64 supporting site, which allows the user to stream a SID “radio station”, play games transferred from the internet (stupid-fast load!), and even play multiplayer with others on some titles. On top of that, Google Maps and ChatGPT. Yes, they work! 🙂
I’m currently looking into what it takes to just host your own games/SIDs and other content, because nothing sucks worse than spending $50 (plus shipping) on a component that is made useless by the website it connects to going down!
* [ SITE ]: https://www.wic64.net/web/
* [ MODEM ]: https://www.protovision.games/shop/product_info.php?products_id=400
* [ MODEM w/ CASE ]: https://retro8bitshop.com/?s=wic64&post_type=product
Note: I know SD2IEC is still a thing, and it’s still in use. However, next to the Pi1541, complete with the ability to emulate a JiffyDOS-modded drive, I feel like SD2IEC’s advantages have more to do with physical size than usability.
Meatloaf

“Meatloaf” for Commodore computers is a hardware device designed to enhance the functionality of the classic computer:
Connects to the internet: Functions as a WiFi modem, enabling the C64 to connect to Telnet BBSes (bulletin board systems).
Emulates a floppy drive: Plugs into the Commodore 64’s IEC serial port and acts like a virtual floppy drive. This allows you to load software and data stored on its internal flash memory, SD card, or even stream it via WiFi using various protocols from servers all over the world (including your own, if you want!).
Supports multiple virtual drives: Meatloaf can be configured to emulate up to 26 virtual drives (IDs 4-30). Each virtual drive can have a different disk image loaded, essentially offering the equivalent of having thousands of floppies connected to your C64.
Supports additional virtual device types: Printers, a network interface, and more.
The info for making one seems unnecessarily scattered and sparse, so I’ll have to do a write-up on it if/when I get a chance to try one out for myself. In the meantime, here’s a couple of launching points for your own journey.
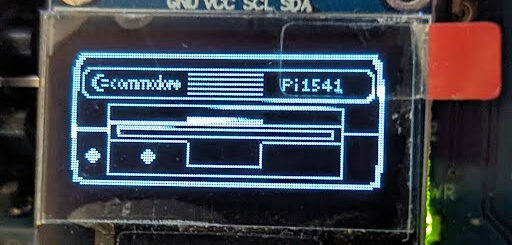
Pi1541

Paired with a Raspberry Pi 3(A or B), this creates a cycle-accurate emulated 1541 floppy drive, complete with IEC connections! Some programs actually rely on the quirks and flaws of the 1541 hardware to load, which makes them unusable with other solutions like SD2IEC. This way you can still drop your collection on a microSD card and have it accessible via either onboard display and nav buttons, or with a HDMI monitor and USB keyboard!
You can often find assembled hats and even complete units with the RPi on eBay, or build one yourself.
You can also use a PiZero, but that requires overclocking and I consider it generally not worth saving the few bucks. Pi4 and 5 are incompatible, as they can’t handle the low-level precise timings necessary to emulate this hardware. Ironically, they are too fast to work at this level!
TeensyROM
A cartridge emulator that allows the user to select and launch .crt and .prg files as if they were a physical cartridge, so those programs can get running so much faster than they would loading from a floppy.
It also brings MIDI connectivity (via USB) to the party, as well as an ethernet connection for super fast internet modem action!
If you load on the OneLoad64 Games collection, you’ll have access to a big collection of instant-load games that have been converted to behave as if they were stored on a cartridge (so darned-near instant load times).
Also, since there’s a USB port available, somebody introduced the neat idea of adding functionality for the Zaparoo (formerly TapTo) NFC card launch system! Alternately, you can take advantage of that USB port to connect a MIDI controller if you want to get jamming with the C64.
The downside is that this is a CARTRIDGE emulator, so no mechanism is present for writing to the SD card storage. When a program/cart image is selected, the emulator configures itself to load that image first on next reset, then resets the computer. The result: the single-load game you chose instantly loads and runs as if it were an actual old-school dedicated cartridge.
* [ BUILD ] : https://github.com/SensoriumEmbedded/TeensyROM
* [ BUY ] : https://www.tindie.com/products/travissmith/teensyrom-cartridge-for-c64128/
* I have posted a more detailed walkthrough on this device right here.
1541 Ultimate-II

Go for this if you have the funds, so many additional features to keep you busy!
Supplies are a bit strained since COVID and the subsequent hike in FPGA prices. They’re working on building back up.
A great deal more expensive, but really worth it. It actually offers the functionality of quite a few other independent mods in one chassis.
- It still performs cycle-accurate emulation of a 1541, but can switch to other drive models to accommodate other floppy image types (1571/1581) without swapping ROM files
- Provides an onboard file management system as well (the Pi1541 requires an external monitor or a teeny OLED screen at the very least to navigate options)
- Has multiple onboard LEDs to display different status states
- Can emulate other cartridges like Action Replay, Retro Replay, The Final Cartridge III, Super Snapshot V5, KCS Power Cartridge, the Epyx fastloader and many more
- Has onboard ethernet that can be used to term into the device and trigger things like virtual disk swaps without rebooting the computer, and can also be linked with the modem emulator
- Yes, there’s a Swiftlink emulator that can let you use the cartridge as a modem over ethernet to “dial out” to BBSes
- Use alternate ROMs for the drive emulator and/or the C64 itself (JiffyDOS here I come!)
- Has an audio output port (headphone) for stereo SID output, local sample playback, or simply providing floppy/tape drive access sounds
Easy Flash III

An excellent way to try out different kernals (to start), or create your own instant-launching program cartridge. Supports 8 kernal images and 7 game cart ROMs. This device can be re-programmed “live” on the C64 without a dedicated EEPROM programmer device. Basically supplants all the devices above for a slightly higher cost.
* https://www.ami64.com/product-page/easy-flash-3-for-commodore-64-easyflash
64HDD

This allows one to use a custom cable to use a PC hard drive for storage, through a custom parallel-to-IEC cable and DOS application. It’s a PC-based software emulation of a floppy drive, and while it can be extended for speed and flexibility with additional hardware, it’s a bit overkill if you just want to play games or surf the BBSes. This system would be most beneficial to active developers.
Of course, you’d actually still need to have a computer with, you know, DOS and a real parallel port on it- an increasingly rare find these days! Although, you could always pick up a Wyse thin client and hack it cheaply for this purpose. Just sayin…
The downside here is that the project itself doesn’t really make load times much faster. For that you’d need to add some additional hardware, which, while it does work well, also occupies expansion slots you might have been wanting to use for other accessories.