Nintendo Wii: Wii-turn of the Jedi

TODO:
Add walkthrough on locating, processing and populating games to library
Ah, the Nintendo Wii, the Gamecube’s weird little brother.

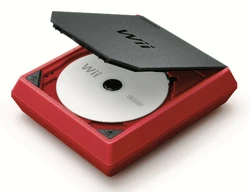
The Wii came along right about the time when HD televisions were starting to become the norm, but out of the box, it was ready to party like it was 1999, all in its cell-shaded, 480i glory. If you got in on the fun early enough, your console was also ready to support GameCube content natively, including ports for the GC controllers and memory cards! Sadly, Nintendo quickly forgot about trying to maintain backward compatibility, and got rid of the GC ports within a few years of the initial console release.
The console itself isn’t really anything particularly epic, but its controllers were definitely something unique.

The Wii nunchuk has a checkered past. I mean, it was definitely an interesting controller dynamic to play with, but if you weren’t paying attention and being careful of your grip… Well, let’s just say YouTube got a big chunk of its most hilarious content at the expense of new Wii players…

Then there were the little add-ons that made some games just a little bit more fun. These were pretty much just molded accessories to snap the nunchuk into, which would give the controller a different shape, while taking advantage of the motion sensitivity to simulate a gun, a steering wheel, or even a hunting bow!
There are 3 main revisions of the console, all are hackable to some degree, with varying levels of risk.
 | 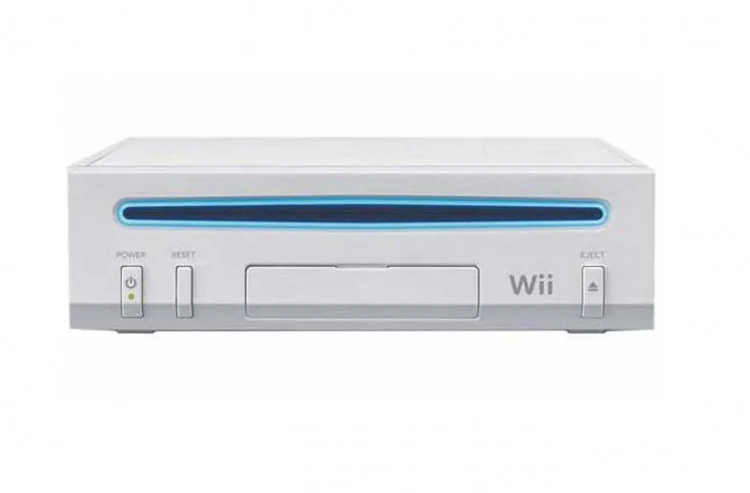 |  |
| Wii (RVL-001) | Wii Family Edition (RVL-101) | Wii Mini (RVL-201) |
The first, RVL-001, was designed to stand on its side, with the GameCube ports facing up from the top edge. You might see a lot of talk about the number of layers in the internal board, with 6 being the most common. 6 layer boards use a lot more power and give off a lot more heat, which is why they tend to experience issues. However, they are also among the easiest to mod or recover (if you accidentally “brick” it), and have the best stock video output (the middle revisions had an issue that made the component video look simply awful).
The RVL-101 Family Edition is not quite as easy to mod, nor recover, but it does tend to be a bit more common to find, and if you have an of the alternate color models, you’re guaranteed to have a 4 layer board inside, meaning it uses less power and runs cooler (and therefore longer).
Wii Mini is the Uncle Fester of the gang; we don’t talk too much about that one. I mean, it works, but it doesn’t have much to recommend it, beyond improved composite video output. Woo. Meanwhile, the SD card slot is gone, so modding got a bit more tricky and unreliable right away.
If you want GameCube AND Wii game compatibility, get the RVL-001. If you just want to get a Wii for its unique controller scheme, it’s definitely worth it, but get the Family Edition.
Also, I’m happy to provide this little walk through one of many different methods available, but let it be known that I’m honestly just re-hashing much more thorough and detailed information available from WiiBrew.org and Wii Hacks Guide. I’m just looking to help shortcut the all of the research and doubt that one can encounter with such a dearth of knowledge. 🙂
- The Initial Mod
- Populating with Content
- Tab 3
- Tab 4
The Goal
Kinda goes without saying with these kinds of projects, but our primary goal is to mod a console so that we can run disc backups from an external hard drive rather than loading from the stock media. This will save wear and tear on the discs and optical drive, and let the games load stupid-fast too!
To achieve this, we have to do a little hacking chicanery. The goal is to get the Homebrew Channel installed to the Wii, which can itself run the custom launchers we’ll use to access the actual content.
This, boys and girls, is generally frowned-upon by the people who proposed, wrote, approved and enforce all that legal mumbo-jumbo you have to agree to at some point when you first starting playing with this console (the EULA). They might not be selling, supporting or even acknowledging this console any longer, but gosh darn it, they can still make a pretty penny re-selling those titles on their new platform, so they’d certainly appreciate it if you didn’t read the rest of this post. They and their associates have worked hard to have it made officially illegal to do what we please with the hardware they were paid hundreds of dollars for, so bear in mind you’re taking a risk here. Modding the console itself isn’t really a major concern (now that the Wii Shop is closed), but modding makes it possible to go back and play those classic games without paying repeatedly for “access” to them on the new console instead, which is the part that pisses them off the most. Now that broadband internet and streaming is a thing, they really regret having sold a tangible, physical thing that they can’t just pluck out of your hands afterward, like an overbearing parent you’re not even living with anymore taking the ice cream cone you just bought out of your hand with a stern “you’ve had enough”.
The likelihood of them going after an individual doing this for themselves is almost negligible. The likelihood of them going after somebody making a profit by buying, modding and selling units based on the ensuing post will almost certainly, eventually catch some threatening attention.
The Components
Gather your stuff; this won’t be too hardware-intensive, but you’ll probably be juggling a little bit
The console
Needs to be a RVL-001 or RVL-101 model for the method I’m using, but there are many other methods available for all of them. (This method doesn’t require an existing game disc; the others do). System Menu 4.3 is preferred, but at this late date, most of the available consoles are probably already running it. Check yours here.

Standard SD card
or an old, small micro SD in an adaptor works too. Anything that can be formatted as FAT32 should be fine. You will also need a card reader as well.

A home PC
A desktop (or laptop) computer will be needed to handle the downloading, extracting and placement of the necessary files on the SD card, as well as managing your game collection. The image is just for reference. I’m not laughing, you’re laughing. STOP JUDGING! Shut up.

A SSD or HDD in an external USB enclosure
SSD would be better for longevity, and it also uses less power than a spinning drive, though there really isn’t any performance benefit otherwise. 1TB is a good sweet spot; you’ll have plenty of space for just about every Wii and GameCube game (if you wanted those) you could want.

The Overview
So we’re firstly on a mission to install the Homebrew Channel on your Wii console. This “channel” (nowadays more readily thought of as an app) allows us to run whatever software we want, and is one of the biggest reasons the firmware actually got up to v4.3 (as they tried to stamp it and the exploits used to install it, again and again.) We’re going to focus on a specific exploit known as Letterbomb, as it’s the most compatible and likely to work for anybody who has a RVL-001 or RVL-101.
Part 1 – Preparing the SD Card
Wipe them out. All of them.
Please note, this process will erase the data on the card! If you have anything on there you want to keep (and I highly recommend you at least take a look first if it’s not a new, in-package card), then get it the heck off to a safe location before continuing on!
Windows
1. Open up This PC
2. Right-click on the drive that contains the SD card and select Format…
3. Under File system, make sure you select FAT32
4. Click “Start” and let the process finalize.
MacOS
1. Open Disk Utility
2. Find your SD card in the navigation
3. Go to the Erase tab
4. Change the Volume Format to MS-DOS (FAT32)
5. Click “Erase” and let the process finish
Linux
1. Open a terminal
2. Send command “sudo mkfs.vfat -F 32 /dev/<location of your SD card>”
3. Be careful not to actually format your main hard disk. Be very wary about formatting /dev/sda1!

Part 2 – Taking Notes
"Perhaps I can find new ways to motivate them!"
Power on your console
Go to Wii Settings
Take note in the top-right corner of the letter next to the system version. This letter corresponds to your system’s region, which may be E(urope), U(nited States), J(apan), or K(orea). Also confirm you’re on System Menu version 4.3.
Navigate to Internet > Console Information
Take note of your FULL MAC address.


"…he's holding a thermal detonator!"
On your computer, open the browser and go to the HackMii website
Input your Wii’s MAC address and region
Ensure “Bundle the HackMii Installer for me!” is checked
Cut either “wire“
Save the resulting zip download somewhere convenient

"Many Bothans died to bring us this information."
Insert your SD card into your computer
Open the downloaded .zip file
Extract the PRIVATE folder and boot.elf file to the root of the SD card

"Good luck! You're gonna need it…"
Reinsert your SD card into your console (you must use the Wii’s dedicated SD card slot; a USB adaptor will not work)
On your Wii, return to the Wii Menu.
Launch the Wii Message Board.
Open the red letter with a bomb.
If the exploit was successful, your device will have loaded the HackMii Installer.


"Ask me again sometime."
Ensure the date on your Wii is correct, otherwise you might be unable to find the letter.
In some cases, you may need to check the messages for tommorow or yesterday for the letter to show up.
If you don’t see the red letter, check if any errors appear in the SD card section of Data Management. If any do, there may be an issue with the SD card format or the Wii’s SD card reader.
If your Wii freezes after clicking on the letter, you most likely chose the wrong system menu region for LetterBomb. Go back to Step 2 and verify that you chose the right region.
If all is correct and there is freezing, keep on trying until it works.
"Would you get going, ya pirate?"
Your console should be powered on and showing the HackMii Installer from the previous part of the guide. You will see a scam warning screen.
Wait 30 seconds for the text Press 1 to continue to appear, then press 1 on your Wiimote.
Select Continue


"It'll work… It'll work!"
Select Install the Homebrew Channel
Once it is completed, select Continue
Select Back, then select BootMii.
Select Install BootMii as IOS.
Once it is completed, select Continue.
If you have the option to Install BootMii as boot2, please do so as well (newer consoles may not have this option available)
Select Exit.
Your console will have booted into the Homebrew Channel.


Running Bootmii Through HomeBrewChannel
If you’re one of the late-comers to the Wii party you may have had to install BootMii via IOS. In that case you have to run BootMii by going into The HBC and hit the “Home” button on your Wii Remote. Place your cursor onto the “Launch BootMii” selection and press A.
Extra Note
While in BootMii, you should back up your NAND memory. This is mainly for those who have installed bootmii as Boot2, but should still be done when installed as IOS. If you brick your Wii and have BootMii installed as IOS and have Priiloader installed, you might be able to recover your NAND by loading BootMii through Priiloader. When in BootMii, you will not have access to the wii-mote, so you will have to use a gamecube controller, or the buttons on the Wii itself. (power button is move cursor, reset button is select option.) THIS ONLY APPLIES TO THE BOOTMII APPLICATION ITSELF, THE HACKMII INSTALLER DOES SUPPORT THE WIIMOTE.
Select the 4th option then hit A/Reset, then you are taken to a new option.
The first corresponds to the backing up of NAND memory, the second; “injecting” NAND back into memory…
Select the first option (you must have at least 512MB of space on SD card to do so) to back up NAND.
To restore a corrupt NAND with an IOS BootMii:
- Load BootMii (The Homebrew Channel or Priiloader)
- Select the 4th option (with the gears)
- Select the 2nd option to restore the NAND
- Wait a while
Okay, finally you’ve done it. The console is now modded. The world is your oyster, all the walls have come down, etc etc. Now it’s time to refine the experience and, ya know, get some content on there!
Getting the games onto the console
(section is WiP)
Now you have a modded Wii, which can run all kinds of homebrew apps, including additional utilities to give your Wii more capabilities than it ever had!
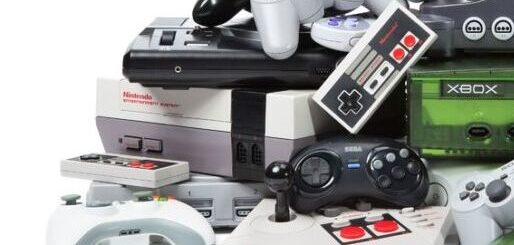
For example, all those consoles in the previous generations? You can emulate most of them on the Wii!
With all that content capability, coupled with the GameCube functionality (if you have RVL-001 model console), you’re going to want that SSD upgrade mentioned previously. It doesn’t have to be complicated, just a 1TB drive with a USB converter cable.

SSD drive
Even a 480GB drive will provide enough space for nearly the entire GameCube and Wii catalogs (or at least the major titles most people care about). Get a 1TB drive if you want to be an absolute completionist with your library.

StarTech SSD USB dongle
Lightweight, reliable, CHEAP.
So here’s the general layout of the field for this project:

The SSD will be formatted as FAT32.

Wii games live in a “wbfs” folder as wbfs files, which are named with their GameID, and each game file is in a folder with its proper name (so you can see what’s what when managing the library from another computer, for example).
The path looks like “/wbfs/Wii Sports [RSPE01]/RSPE01.wbfs”

GameCube games live in a “games” folder, as iso files using a a more legible naming convention.
The path looks like “/games/F-Zero GX (USA).iso”
The Wii will find these titles and add them to the Wiiflow catalog navigator for easy selection and running after things have been setup properly.
Let’s get things set up:

First, you will need to be able to actually format that SSD as FAT32. Windows won’t do this easily on its own with large drives (and can take forever if you try to force it through commandline/Powershell methods). Just go get GUIFormat. It’ll handle the task without complaint, without delay, and without threat.
Extract the folder, run GUIFormat and select the new drive to be formatted (if it’s brand-new, it may not be partitioned at all, in which case you’ll need to at least format it normally as you would any new disk in your OS, then come back to GUIFormat to handle the FAT32 formatting)

Create a new folder in the root of the new drive, called “wbfs”. That’s all, no caps, no fanciness, just “wbfs”, the end.

Now, you will need Wii Backup Manager. Its task is to help manage your backups. You know, the ones you’re storing and running on the SSD?
Launch Wii Backup Manager and go to the Drive 1 tab. In the dropdown to the left (it may read “Inactive”), select the new drive letter. In my case, that’s the G: drive.

Now go get your backups. You should only download the backups that match games you’ve already bought for your Wii. I mean, nobody’s getting short-changed if you really want to try that Buck Fever game your uncle keeps raving about, but…

Don’t mess with disc headers
There are a couple of options in Wii Backup Manager’s Options > Settings > Titles tab to allow changes to disc headers. Do NOT enable these. They aren’t necessary, don’t make any useful difference for our purpose, but do have buggy code that has the ability to corrupt your backup drive while copying things over.

Once you have everything brought in, you will need to add them to Wii Backup Manager for processing.
Go to the Files tab, and click Add > Files…
Navigate to the location where you stored your backups, and select them. They will then show up in the WBM interface. When you select one, it should shortly populate with the cover images too. No big deal if it doesn’t; it’s just a nice graphical touch.
Now select the new files you just added, then click Transfer > Drive 1. The program will now copy your backups to the backup drive, with the appropriate folder and file names needed for the Wii to see and use them.
You can also use this program to convert ISO files to WBFS format
GameCube backups will work much the same, with the following differences:
BACKUP SOURCES
UTILITIES
You will need to unzip the backups you download for GC; they should extract as .iso files.
You will use GameCube Backup Manager in a similar manner to Wii Backup Manager (their interfaces and options are very similar)
GameCube games go into the <backupdrive>\games\ folder. GCBU should handle the details during the transfer phase, including destination folder setup and naming of files as appropriate for multiple-disc titles.
Transfers done, it’s time to move the drive over to the Wii!
Add your content here…
Add your content here…